D. Subtract the shortest distance measured
from the longest distance measured, if the difference is more than two
(2") inches your pool is "out-of-round" and you will need to adjust the
length of some of the rafters to allow the frame to properly fit the top
of your pool. We recommend trimming rafters down on opposites
to get the proper fit rather than extending opposites with the spacers
provided. Trimming is preferable and easier.
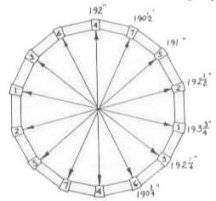
POOL MEASUREMENT DIAGRAMS -
(SAVE FOR FUTURE USE)
 |
|
||
 |
|
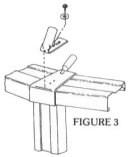 |
STEP 2: INSTALL THE MOUNTING
BRACKETS (RESIN CAPPED AND RESIN TOP RAIL POOLS, PLEASE SEE NEXT PAGE)
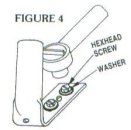
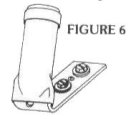
A. Attach the mounting backets as shown in
Figure 3 on the top cap of each vertical support. The mounting bracket
should be located near the outside edge of the top cap, centered on the
cap, but not extending past the outside edge. Mark on the top cap,
with the indelible marker, the location of the two outer holes on the mounting
bracket, leave the center hole open. See Figure 3.
|
 |
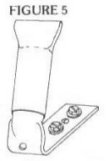
B. Drill your holes with the 3/16" drill
bit. DO NOT LET THE METAL SHAVINGS FALL INTO THE POOL WHILE DRILLING.
It is best to have a vacuum ready and running while you drill to take away
the shavings. See Figure 3.
|
The new resin capped and resin top railed pools that have
come into the market place cause no problem for the installation of the
universal brackets. They can be installed just as easily as pools
with metal caps and rails. There are a few minor changes that must
be done. Especially those newer top rails that are wider than 6".
 |
When installing these anchors, make sure the anchor goes throught both, the top cap and the top rail! If the underneath of your pool top rail is accessible, you can also use a bolt, nut and lockwasher arrangement. If neither of these applications will work on your pool, please contact:
4222 So. Pulaski Road,
Chicago, IL 60632
Tool Free 1-800-621-8546
3. The "J-hooks" can be installed on the resin vertical supports, using standard conical plastic anchors and combo pan head screws. These are also readily purchased at your local hardware or home improvement center.