





Swim Spa Enclosure Installation
A complete, detailed set of assembly instructions is provided with each unit.
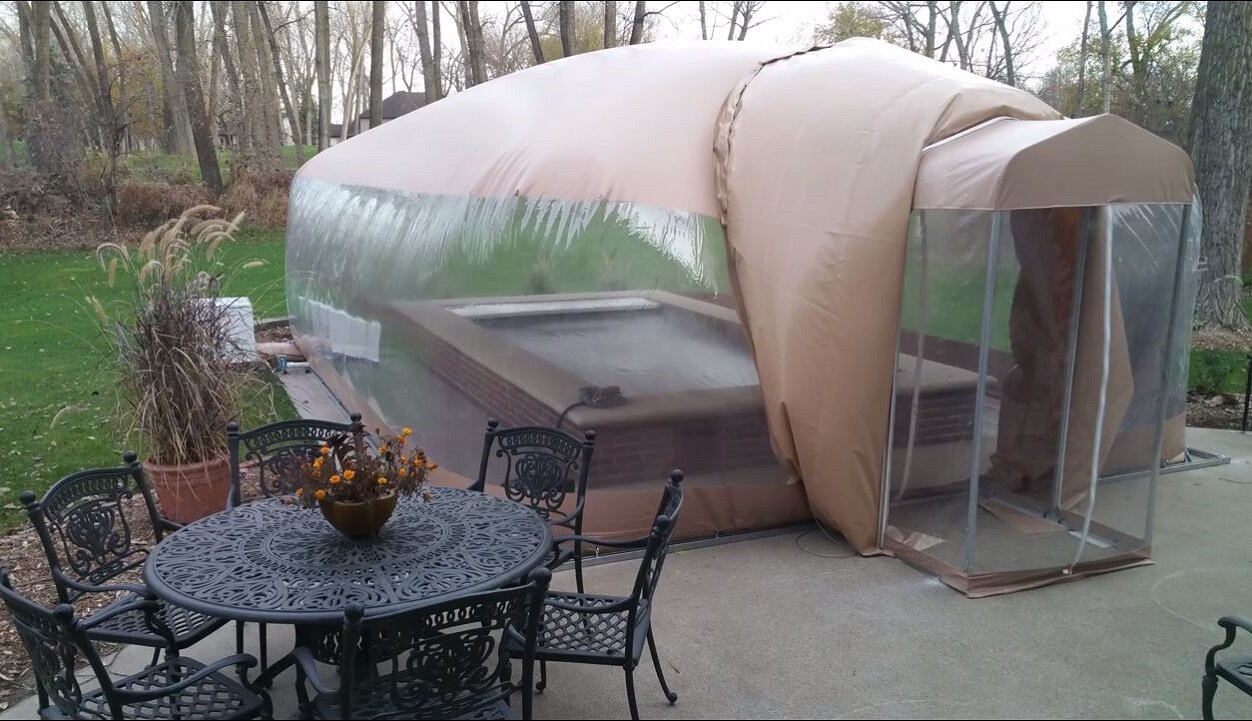
The enclosure is designed for owner installation. A typical project takes about 6 to 8 hours, allowing an experienced do-it-yourselfer to complete it in a day.
Plan your mounting surface and tools before you begin. Follow the instructions supplied for your own enclosure and equipment.
Prepare Your Mounting Surface and Tools
Concrete or Wood
The enclosure can be mounted to concrete or wood. Wood surfaces need preparation to prevent air loss. Send photos showing the proposed surface, changes in level and nearby features so we can review mounting and access before you order.
Hammer Drill
A rotary hammer or hammer drill is required. These tools can be rented. Ask your local rental company for current availability and cost. Check the supplied assembly instructions before arranging a rental.
Follow the Instructions Supplied with Your Room
These are the main stages of installing an air-supported room. Use the instructions supplied with your enclosure for its exact anchor layout, hardware, drilling dimensions and equipment setup.
1. Mark the Room and Anchor Locations
Mark the enclosure perimeter on your mounting surface, then mark the anchor positions using your room’s layout. Confirm the airlock location before installing the anchors.
2. Install the Anchoring Kit
For concrete, drill the anchor holes with a rotary hammer or hammer drill and install the supplied anchors. Follow your room’s instructions for hole size, depth and any wood-deck requirements.
3. Position and Secure the Enclosure
Spread the vinyl carefully without dragging or scraping it across the deck. Position it along the marked perimeter and secure it with the supplied anchoring hardware, including the corners.
4. Set Up the Airlock and Blower
Assemble the double-door airlock and position the supplied blower and pressure regulator as directed. Inflate the enclosure, then check the perimeter and entrance for air loss.
See the illustrated Ameri-Dome installation overview for an example of the related system. Your room’s supplied instructions remain the guide for your installation.
If you have questions about how the enclosure is installed, call 800-982-6966. We can discuss the installation with you before you begin.
After Installation
- Installation Photos
- Send Ameri-Brand photos showing proper installation. Your warranty is activated when Ameri-Brand validates the installation and provides written acknowledgment by email.
- Supplied Equipment
- Use the supplied blower and pressure regulator. Keep the enclosure anchored according to its installation instructions for as long as the room is in place.
- Removal and Storage
- The room can be deflated, removed and stored in a small area. Store it clean and dry, out of direct heat. Inflation typically takes less than 15 minutes.